
These changes have recently been rolled out in October 2020.
- Supplier import & export process
We have now made the supplier export and import process easier. To download the list of suppliers set up in ProSpend, please login as Admin → Export Database → Supplier Export.
.png)
You can make all the changes you want to make to the existing suppliers in this list and re-import the same file into ProSpend using the “Import” function in the supplier setup.
.png)
Note: Leave the supplier IDs as they are. The system will use them to update the suppliers.
To add new suppliers, you can use the same template but remove the “Supplier ID” column and add the details of the new supplier(s) in all the required columns.
- Purchase Order line item
When creating a Purchase Order, as soon as the user chooses the supplier and clicks on “Save”, the system will now automatically create an item instead of the user having to manually click on “+ Item”.
This new item is pre-expanded, so the users can start coding it straightaway.

The user can continue to add more items as they do now.
- PO amount on PO PDF
The users will now see an option to display or not display net amount, GST amount and the gross amount information on the PO PDF.
User can choose “Show on PO” in the PO Amounts field as below:
.png)
Below is what the PDF looks like:
.png)
If the user chooses “Hide on PO” in the PO Amounts field as below:
.png)
Below is what the PDF looks like:
.png)
You can also choose what the default should be for all the POs. Please reach out to us, so we can set it up for you.
The PO will be emailed to the claimant after the approval, who can then forward it to the supplier.
- Export Database
Reporting is one of the wonderful tools within ProSpend. "Export Database" is a special report available for all the admin users, which allows them to export different lists such as cost centres, users, expense types, etc.
"Authorisor Export" file has now been updated to include information on all the active approvers in the database along with their approval limits for expense, invoice and purchase order.
- Welcome Email
When you create a new user and add their login, there is no need to add the password. Tick the option 'Send Welcome Email' and save changes. The system will auto create the password and will include it in the welcome email. The user will still need to change the password on their first login.

- Claim Search
Previously, the system displayed the default category and cost centre of the claimant against each claim on the “Claim Search” screen for payers and admins.
We have now changed this for the supplier invoices and the purchase orders. We display the category and cost centre from the first line within that supplier invoice or purchase order.
For all the other claim types such as cash claims and card claims, the system continues to show the default category and the default cost centre of the claimant.

- Default Expense Type (Project)
Admins are now able to set up a default expense type for project. So, when a user selects a project code, the system defaults the expense type. The default can either be locked or left open for the user to change.
Contact us for activating this feature.
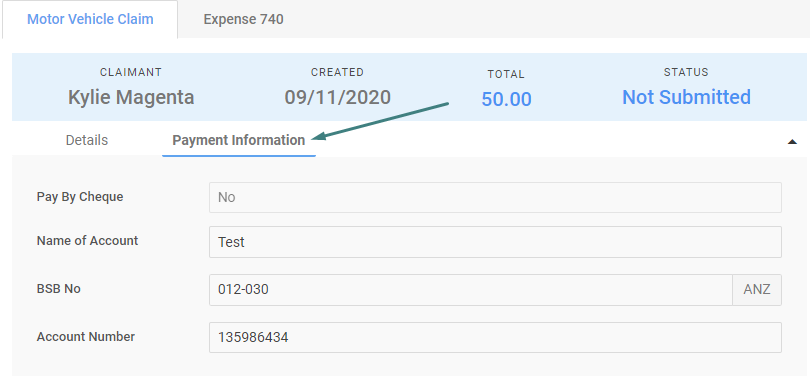
- Bank details on Mileage claim
Users are now able to enter or default the bank account details from their profile for the mileage claims.
- Date columns on claim search
We have now included the invoice date and the due date information for the supplier invoices on the "Claim Search" and the "Update Claims" screens, so the payers do not have to go into each supplier invoice and can also use this information for filtering or sorting the claims.
Note - these 2 columns will only appear if the supplier invoices module has been enabled.
.png)
- Sync for MYOB Advanced
Previously, when the admin syncs the suppliers or projects with MYOB Advanced, the system performs the sync immediately and updates the records in ProSpend. Moving forward, when the admin syncs the suppliers or projects, the system will schedule the sync behind the scenes and displays the below message -
.png)
If the sync has been completed successfully, the system will send an email to that admin confirming this. In the same way, if the sync fails, the system will send an email to that admin along with the errors encountered.
Below are the reasons why we moved to this scheduled syncing approach -
- The sync process would fail for a large number of projects or suppliers if it is not scheduled (as the browser would timeout).
- The scheduled sync will enable us to do auto syncing moving forward based on a syncing automatically at certain periods.
- Scheduled sync will also ensure multiple syncs cannot happen at the one time (as this can cause issues if two people sync at the same time).