NetSuite Supplier Sync
Our clients using NetSuite will now be able to sync supplier data from NetSuite to ProSpend.
ERP Sync
To sync the suppliers, the admins have to go into ERP Sync section, tick Suppliers and then click on Update.

Active Suppliers
ProSpend will create all the suppliers that are active in NetSuite i.e in the supplier profile in NetSuite, checkbox against the Inactive field isn't ticked.

Supplier Fields
ProSpend will import below data for suppliers when syncing them from NetSuite -
NetSuite Field ID |
NetSuite Section |
ProSpend Field Name |
| entityid | Primary Information | Supplier Code |
| companyname | Primary Information | Pay To |
| firstname | Primary Information | Pay To |
| (Email | Phone | Address) | Email Address | |
| defaultaddress | (Email | Phone | Address) | Address |
| vatregnumber | Tax Information in Financial tab | ABN |
| terms | Account Information in Financial tab | Payment Terms |
| currency | Account Information in Financial tab | Currency |
The Pay By Cheque field will always be set to Yes and no bank details will be imported from NetSuite.
Please reach out to us if you want this enabled in your ProSpend site.
Export Ref Column in Expense Report
We have introduced a new column in our expense report called Export Ref. This is placed after that Exported column.
This Export Ref column will be populated for our clients exported claims via API to other systems such as MYOB Advanced, Xero, NetSuite, etc. The export refs will be the same as the export refs that are shown on the export batch screen once the claims have been exported.


If you are able to click on the export refs on the export batch screen, then you should be able to click them on the expense report screen too. If your export batch screen just shows a text instead of hyperlinks, then the expense report will just have the text too.
For clients using non-API exports, this column will be blank.
If you download the expense report in Excel or .CSV format, you will now see an extra column for these export refs.
Supplier Documents
You can now upload documents for suppliers via Documents section on the supplier setup screen. This can be used to upload your contracts or agreements with that supplier, any important correspondence or any other files.

To upload documents, you can click on Documents, then click on Click to upload, choose the documents from your computer and then upload them.

Once a document has been uploaded, you can see them as below. You can't view them in ProSpend itself but you can click on them to download and view it on your computer.

You can upload documents in below formats -
- Image (.jpeg, .jpg, .gif and .png)
- Word (.doc)
- Excel (.xlsx)
- Email (.eml)
- Zip
For Word, Excel, Email and Zipped files, we don't show previews. Those documents will just display icons.
You can also delete these documents by clicking on the Delete icon.

To view documents that have been deleted in the past, you can change the filter on the top to Show Hidden and the system will display deleted documents. You can also reinstate them by clicking on the Undo Delete icon.

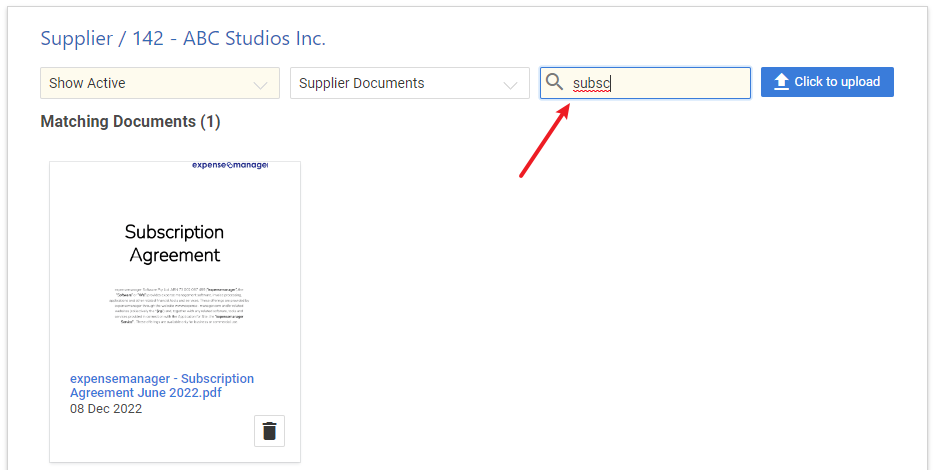
You can also search for documents using the search bar.
.png)
This documents feature is purely to store the documents against suppliers. ProSpend does not initiate any other processes (scanning, validity checks, etc) based on the documents that have been uploaded.
